
What’s New in SharePoint 2010 – SQL Snapshots
Content deployment was traditionally one of the more “messy” things to deal with in SharePoint 2007. Although much remains in the same in terms of how you configure content deployment, the product team has provided us with a new way of getting content transferred to our destination server, using SQL database snapshots. The traditional form of content deployment is still available, which extracts the data that will be moved from the source content database, puts it into a flat XML file, then uses another import process to parse that XML file and put the content into the destination content database. Since that process involves a “translation” process to get data from a database to XML and back to a database, there were times where this didn’t seem the most efficient way of moving data. Now with SharePoint 2010, if you’re using SQL 2008 Enterprise edition, you can have SharePoint create a snapshot of the database, and have that snapshot itself shipped to the destination server.
Microsoft has published some excellent resources on content deployment in SharePoint 2010:
- Here’s a nice downloadable poster which fully describes the content deployment process.
- Content Deployment Overview on TechNet
- Plan Content Deployment on TechNet
- Content Deployment Topology Design on TechNet
- Manage Content Deployment Paths and Jobs on TechNet
Visual Overview
The purpose of this article is to show you the step by step process of setting up a content deployment job in SharePoint 2010.
Creating the Destination Site Collection
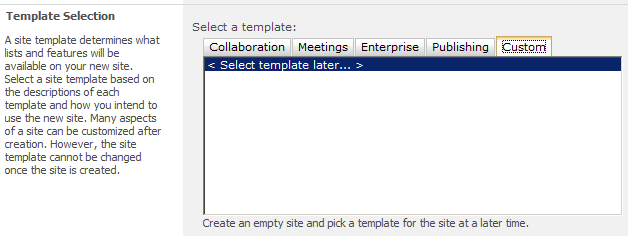
The purpose of content deployment is to move content from a “source” Site Collection to a “destination” Site Collection (preferably in a different Web application at a minimum, and more realistically, in a different server farm.) However, for the process to work correctly, you need to create your destination Site Collection without a template. (Keep in minding, creating a Site Collection using the “Blank” site template is not the same as creating a Site Collection without a template, as confusing as this sounds!)
To do this, you’ll go to the “Create Site Collection” page for your destination Web Application, and click on the “Custom” tab when choosing your site template. Highlight the option that says “< Select template later… >”.
Configuring your Destination Server Farm
Your “home base” for managing your content deployment settings in your farm is the “General Application Settings” page in Central Administration. You should see a section at the bottom of the page with links to the Content Deployment settings.
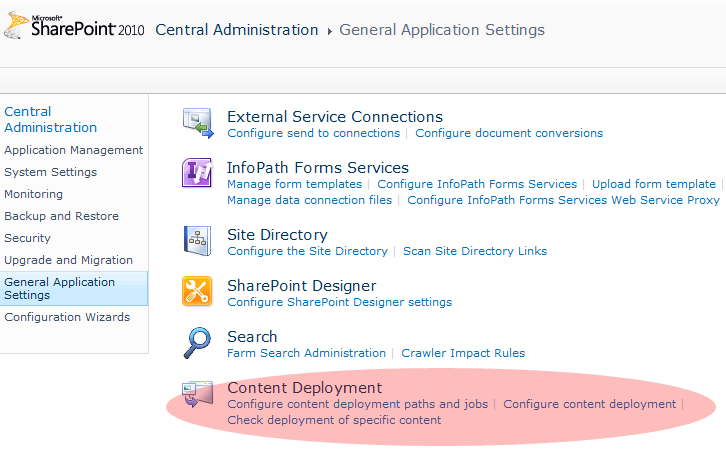
You’ll need to configure the destination server farm to accept incoming content deployment jobs. To do this, click on the “Configure content deployment” link on the General Application Settings page in your destinationfarm.
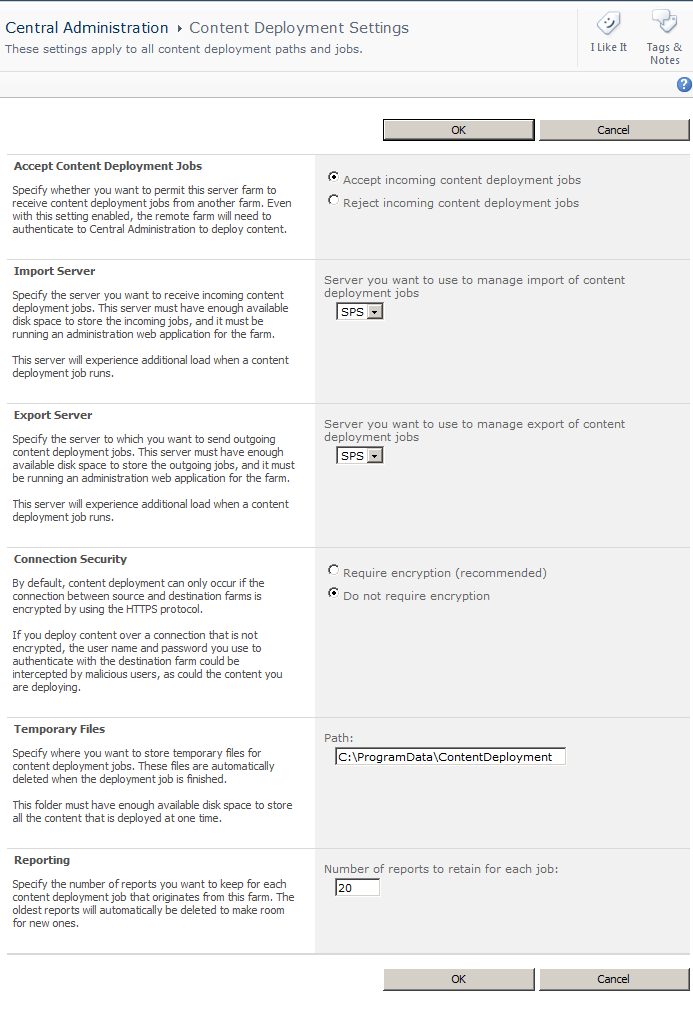
You probably won’t be exporting any content from your destination farm, so you’ll be primarily concerned with the first two settings on this page. The first thing you need to do is select the “Accept incoming content deployment jobs” radio button. The next thing you need to do is to specify which server in your destination farm will be responsible for receiving the incoming content deployment jobs.
Configuring your Source Server Farm
Return to the same page in your source destination farm, this time specifying which server in your farm will be responsible for exporting content deployment jobs. You’ll need to specify whether you want the user name, password, and deployment content passed to the destination server using a secure or insecure connection. You’ll also need to specify a location that is accessible by both servers, where the temporary files (such as the exported files) can be placed.
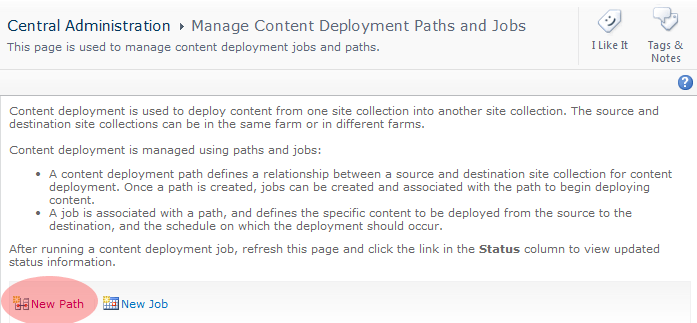
Creating a New Path
Now that you’ve set up both server farms and created your empty Site Collection, it’s time to set up your content deployment “path”. This is what tells SharePoint which Site Collection in the “source” farm maps to which Site Collection in the “destination” farm. To create a path, go to the General Application Settings page and click on the “Configure Content deployment paths and jobs” link.
To create a new Path, click on the “New Path” button.
This will take you to the “Create Content Deployment Path” page.
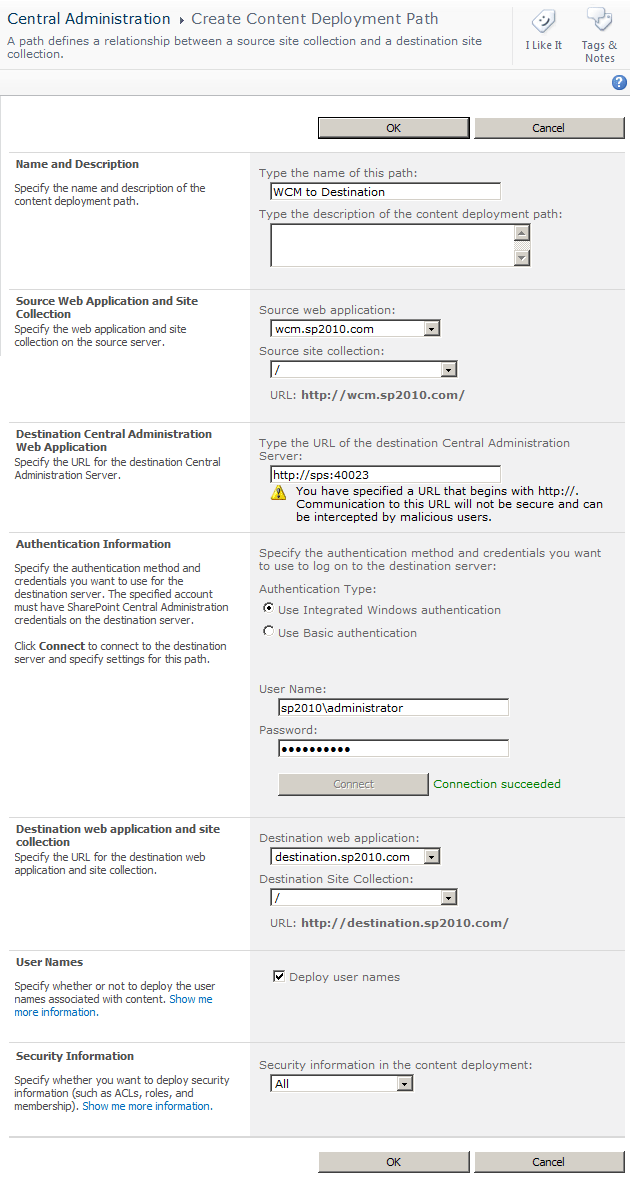
On this page you’ll need to give your content deployment path a page, and then specify which Site Collection you’re exporting. Next, you’ll need to specify the URL of the Central Administration site in the destination server farm. (Note that if you don’t use a secure connection, the credentials you pass to the destination server could be intercepted.) You’ll need to type in credentials that are valid on the destination server, which will be used on the destination server to import the data into the Site Collection there. Once you’ve typed in valid credentials, you’ll click the “Connect” button. If the credentials are successful, you’ll see a list of the available Web Applications in the destination server farm, and then you’ll be able to choose which Site Collection you would like to export to. Finally, you can specify which security objects you’d like to export, whether that’s individual users, or roles, ACL’s, etc.
Creating a New Job
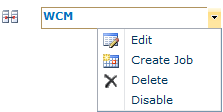
The next thing we need to do is to set up a timer job which will export on a regular basis the Site Collection data we defined in the path we just set up. You can easily create a new job by returning to the “Manage Content Deployment Paths and Jobs” page and selecting the drop down menu next to the Path you just created, and selecting “Create Job”.
This will take you to the “Create Content Deployment Job” page.
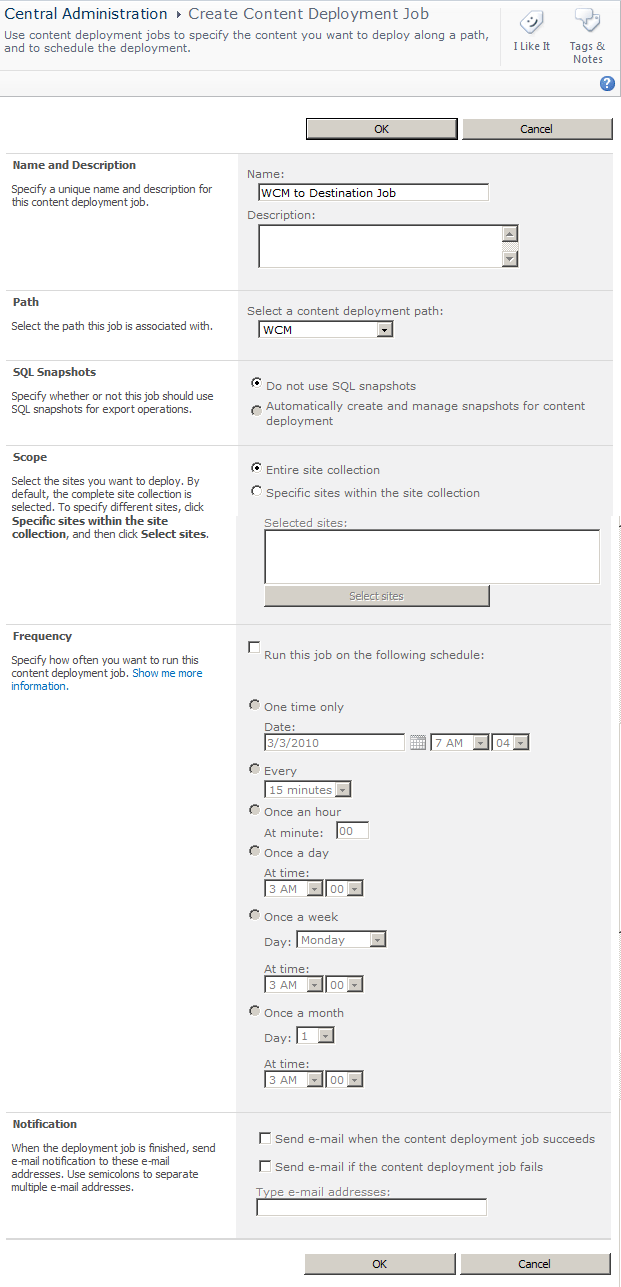
This page allows you to specify exactly which content gets exported and how often the process happens. The first thing you need to do is to give the job a name. Secondly, you need to specify which Path you’ll be using. Next, you need to specify whether you’ll be using the new SQL snapshot mechanism for exporting data. (Since the server I’m using for this walk through is using the single-server installation of SharePoint, snapshot is not an option. Note that you need to have SQL Server 2008 Enterprise edition for this option to available.)
The “Scope” section allows you to decide how much content gets exported. You can choose to export the entire Site Collection. However, you can also choose to just export certain sections of your Site Collection. You can do this by browsing a tree view of your Site Collection and selecting just which Subsites you want to export.
Your next option is to select how often you want the job to run. (You don’t actually have to specify a frequency, if you only want to execute this job manually, on-demand.)
Last but not least, you can specify if you want notification e-mails to be sent on success and/or failure of the job.
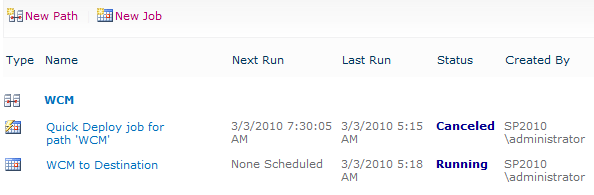
Viewing Job Status
Once you have configured your jobs, you can view their statuses from the “Manage Content Deployment Jobs and Paths” page.
Clicking on the status of a job will take you to a page where you can see the progress of a given job, like this:
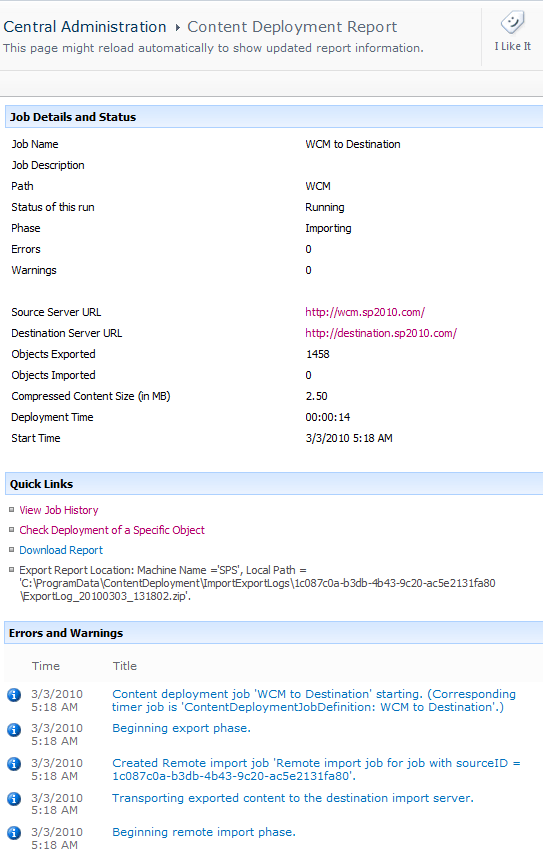
As you can see, the report will show you how many items have been exported, and how many items have been imported. In addition, the report will show you the name of the Timer Job that is being executed. (Clicking on the Timer Job status message will actually take you to the Timer Job itself, which is helpful if the job seems to have stalled for any reason.)
Conclusion
Hopefully this article has given you an idea of the steps you’ll need to walk through when setting up a content deployment process for the first time in SharePoint 2010.