
Today, Microsoft Loop was released to “Public Preview”, meaning anyone can now install and start using the new application in their tenant to test it out. So…
What is Microsoft Loop?
Loop is a little difficult to explain because it really is its own thing. The idea is that you can quickly created “workspaces” that have pages, and those pages have “components” that can be added to them. (Sounds a lot like web sites, web pages, and widgets/web parts/etc., right? Same idea.)
The secret sauce is that these components update real-time across applications in Microsoft 365, so if you update a component’s content in Teams, your update will appear in the component that was sent in an e-mail.
The concept behind this is the same as sharing Office documents that are rendered using Office Online. A Loop component (a file with a .fluid extension) is stored in the OneDrive account of the person who created it. When the component is shared with others, they are editing the live file, much like users can co-author an Office document, whether they are editing it as a tab in Teams or using their desktop Office application. In this case, users are all co-authoring the .fluid file and it is being rendered “live” in whatever application you are viewing it in.
To learn a little more about how Loop works, take a look at Microsoft’s intro video here.
Creating a Workspace
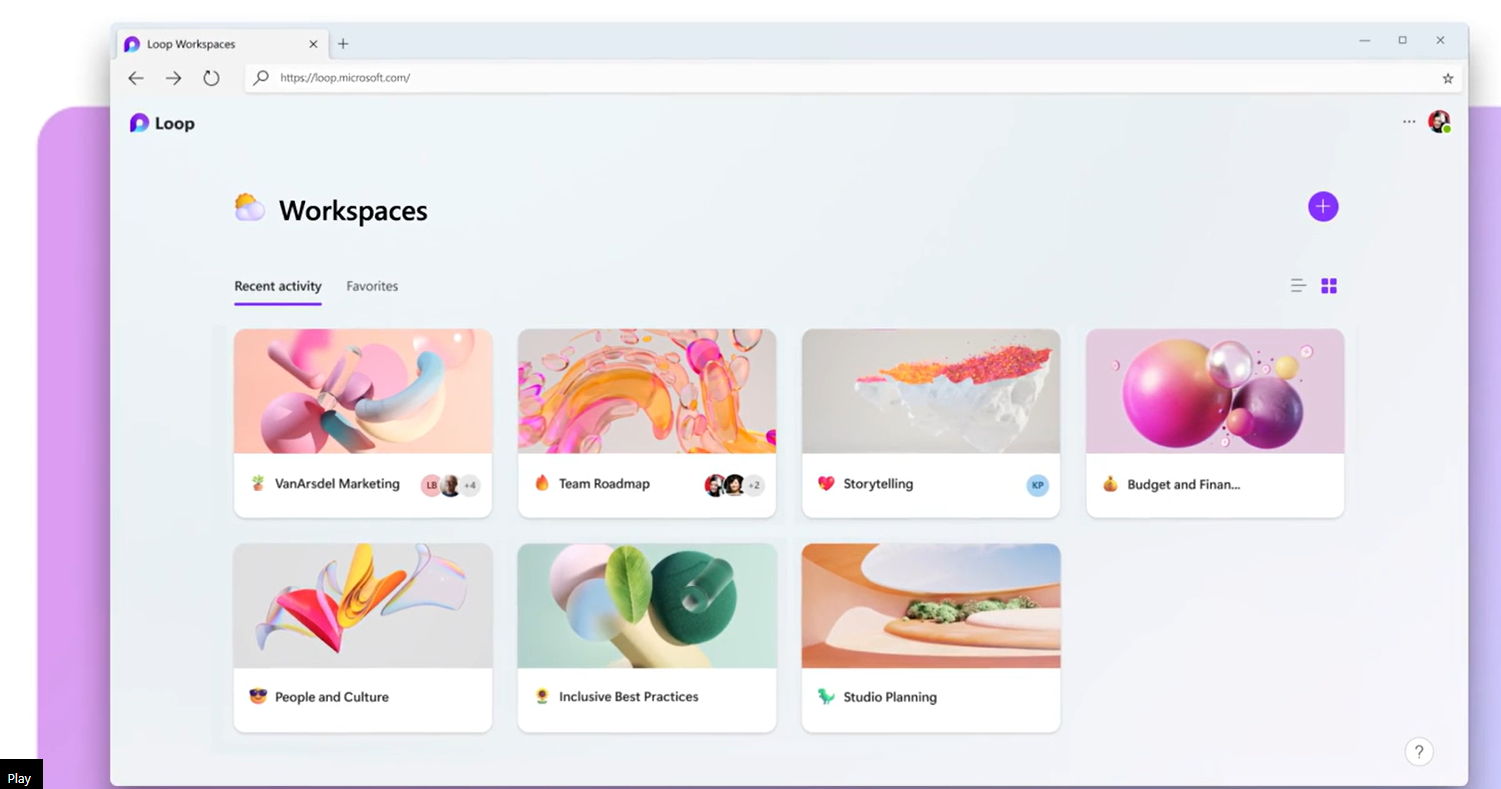
Once you have logged into Loop, you will gain access to the library of your Loop assets by going to the Loop homepage (at https://loop.microsoft.com) much like you would view your Sways or your Forms by going to the landing page for each of those.)
From here, you can create a new workspace. Note that you can assign an emoji icon when you are creating the workspace, similar to how you can assign in icon to your team in Teams.

Creating a Page
Next, you can create pages. This user experience is very similar to One Note, in the sense that you will create pages that will appear in the left navigation bar, and you name each page by adding a title to the top of the page.


Similar to adding a header to a Microsoft form, or a SharePoint page, you can also choose a background for the top of your page. As of now, it doesn’t appear that you can upload your own image. However, like To Do themes (or Facebook post backgrounds), you can choose from several pre-defined options for your page background.
You also can add another emoji for your page. (You can see I added a surf boarder, which shows up at the top of the page and next to the page name in the left navigation, above.)
At this point, it’s possible to start typing away. Note that the power of Loop is in creating quick, sharable ideas (similar, as mentioned to One Note), and not creating fancy formatting for highly graphical web pages. (I suggest you use Sway or Power Point for presentations, or SharePoint for web pages.) While it’s possible to add formatting once you get going, to start with, you’re probably just want to get right to typing your content.
When you’re ready to start adding more content such as headers, images, bulleted lists, and more, you can type “/” which will open a context menu. While some of the items you can add are graphical, others provide the ability to create more dynamic content, such as adding a poll to your page.


Not only can you add new elements to your page, but others can react or comment on the different elements, using the context menu.
If you decide you want to start with a template instead of creating a page from scratch, you have several options to start with, including the humorous “Bad Brainstorm Idea” template.

Adding a Component
The fun part begins when you decide to turn an element on your page into a component, which means it’s now able to be viewed and edited in other apps. To do this, you will select the menu next to the element you want to capture, and then you will choose “Create Loop component.” You will now see the item outlined in a purple box.

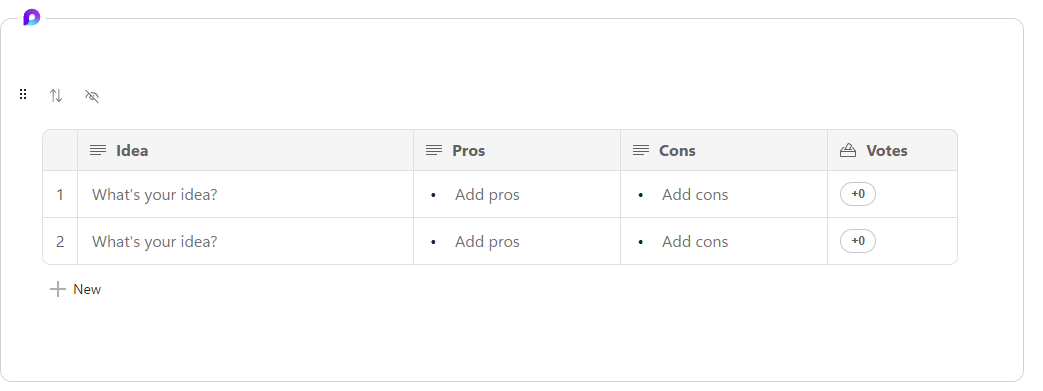
Loop Component Defined in the Loop App
At this point, you can create a sharing link that can be embedded in other applications. (Note that if the application doesn’t support Loop, it will just show up as a really long hyperlink!) If the application supports it (such as Teams or Outlook) then you the Loop component will sync and then render. Any changes you make to the component will then be updated for everyone else who views it.
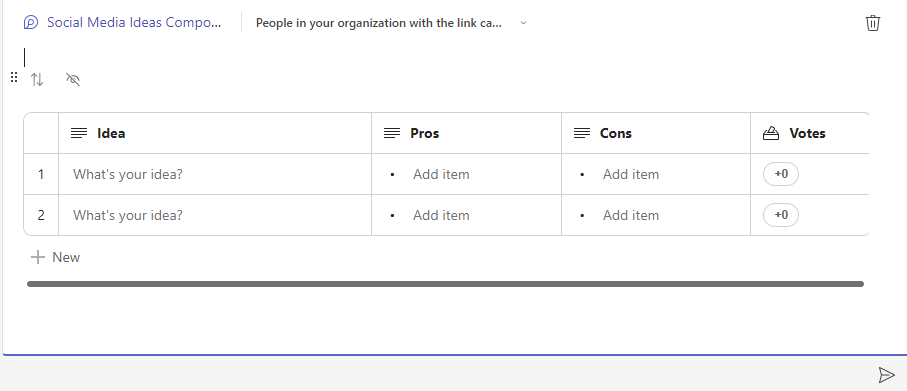
Loop Component as Displayed in Teams Chat

As with sharing documents from SharePoint or OneDrive, you can specify the sharing options as well. Notice that there might be additional options based on where you are sharing the component. In this screenshot, you can see that you are sharing the component with others in the chat. (Note that Loop components are currently only available in Chat in Teams and not in Channels, although that is sure to come soon.)
Here you can see what the component looks like in Outlook Desktop.

Last but not least, notice that you can create Loop components directly from within your apps such as Outlook or Teams.

Documentation
There are a few settings that need to be enabled in your tenant currently, in order for Loop to be enabled. This link explains the tenant configuration policies that need to be in place first.
This document gives an overview of how Loop components are shared.